One-click installation and upgrade of applications through application templates
This tutorial will demonstrate some of the core capabilities of Rainbond application template management:
- Application template management: Package applications into reusable templates, supporting version control and distribution.
- One-click deployment: Quickly install pre-configured applications through the application market.
- Version management: Supports application upgrades and rollbacks to ensure business continuity.
Preconditions
- Completed Rainbond quick installation.
1. Create an application template (version 1.0)
🚀 Highlights
- Template configuration: Package application configuration, dependencies, and environment variables into reusable templates
- Version tagging: Supports semantic version numbers for easy tracking and management
🧩 Operation process
-
Deploy container image service
- Enter the target team view and create a new application named
source-app. - Select build from image ➡️ container.
- Name:
app. - Image address:
registry.cn-hangzhou.aliyuncs.com/goodrain/nginx:alpine
- Name:
- Other configurations remain default.
- Enter the target team view and create a new application named
-
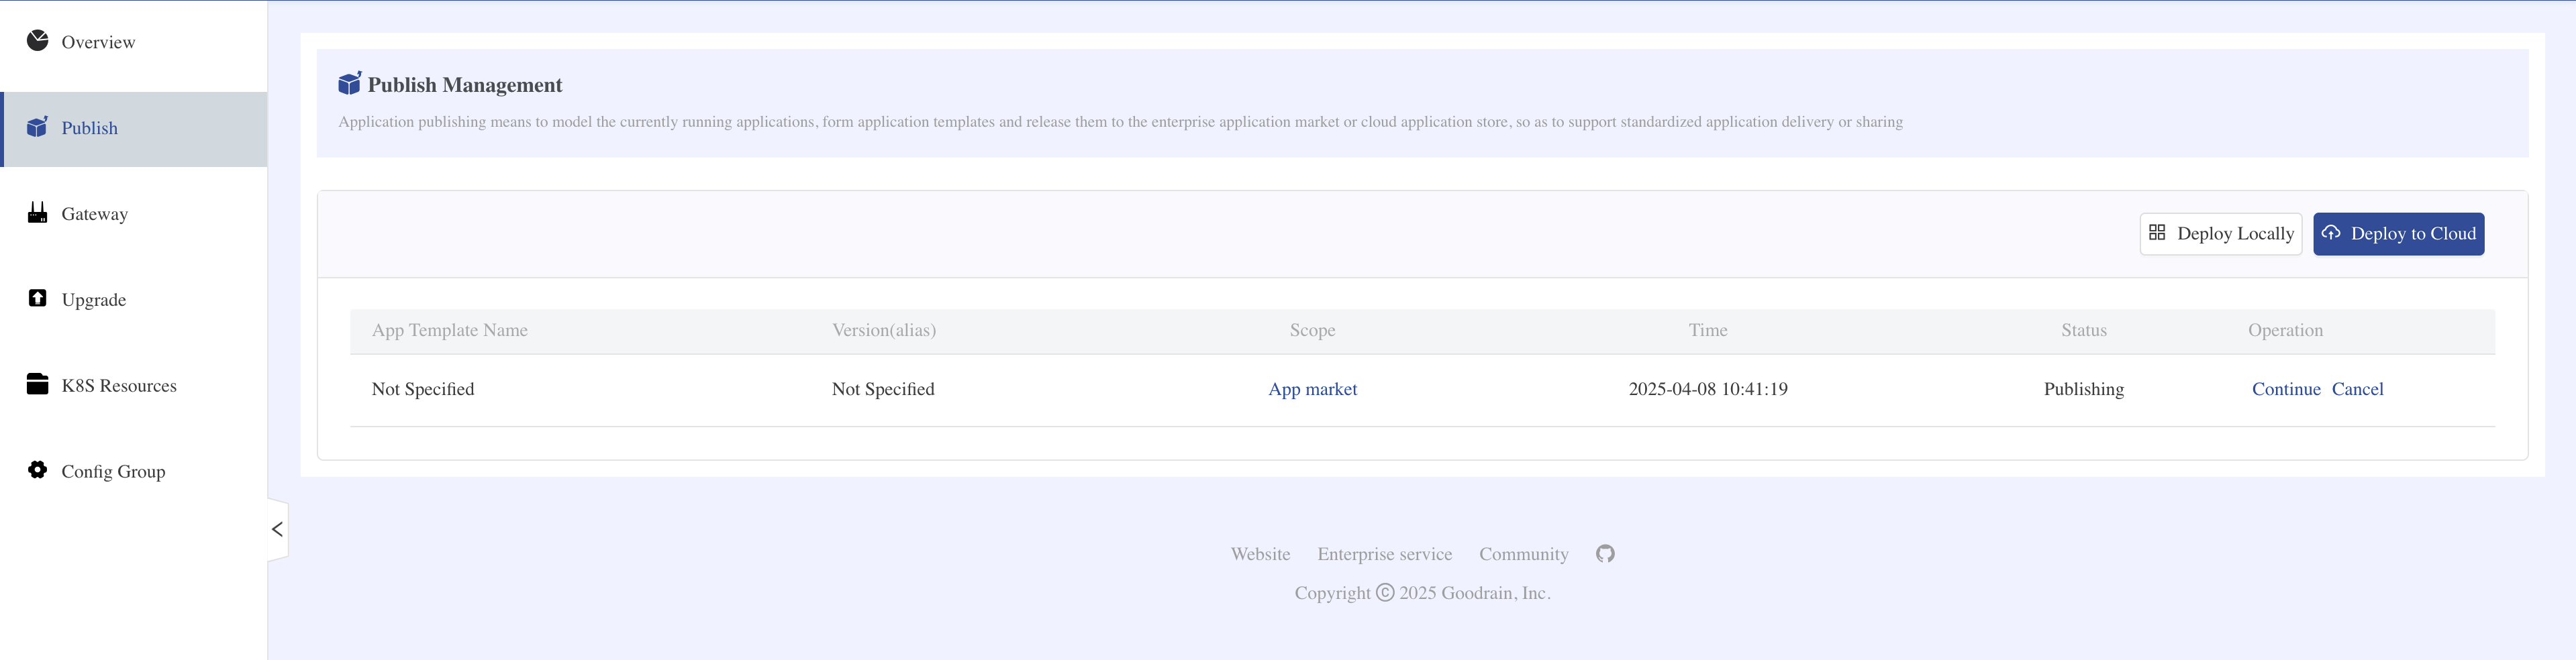
Publish to local component library
- Enter the application view ➡️ publish application ➡️ publish to component library.
- Create a new application template:
- Template name:
app-template. - Version number:
1.0.
- Template name:
- Other configurations remain default.
- Confirm submission.
2. One-click installation of application template
🚀 Highlights
- Zero-configuration installation: One-click deployment of pre-configured applications without manual setup
- Environment isolation: Supports installing the same template across different teams and clusters
🧩 Operation process
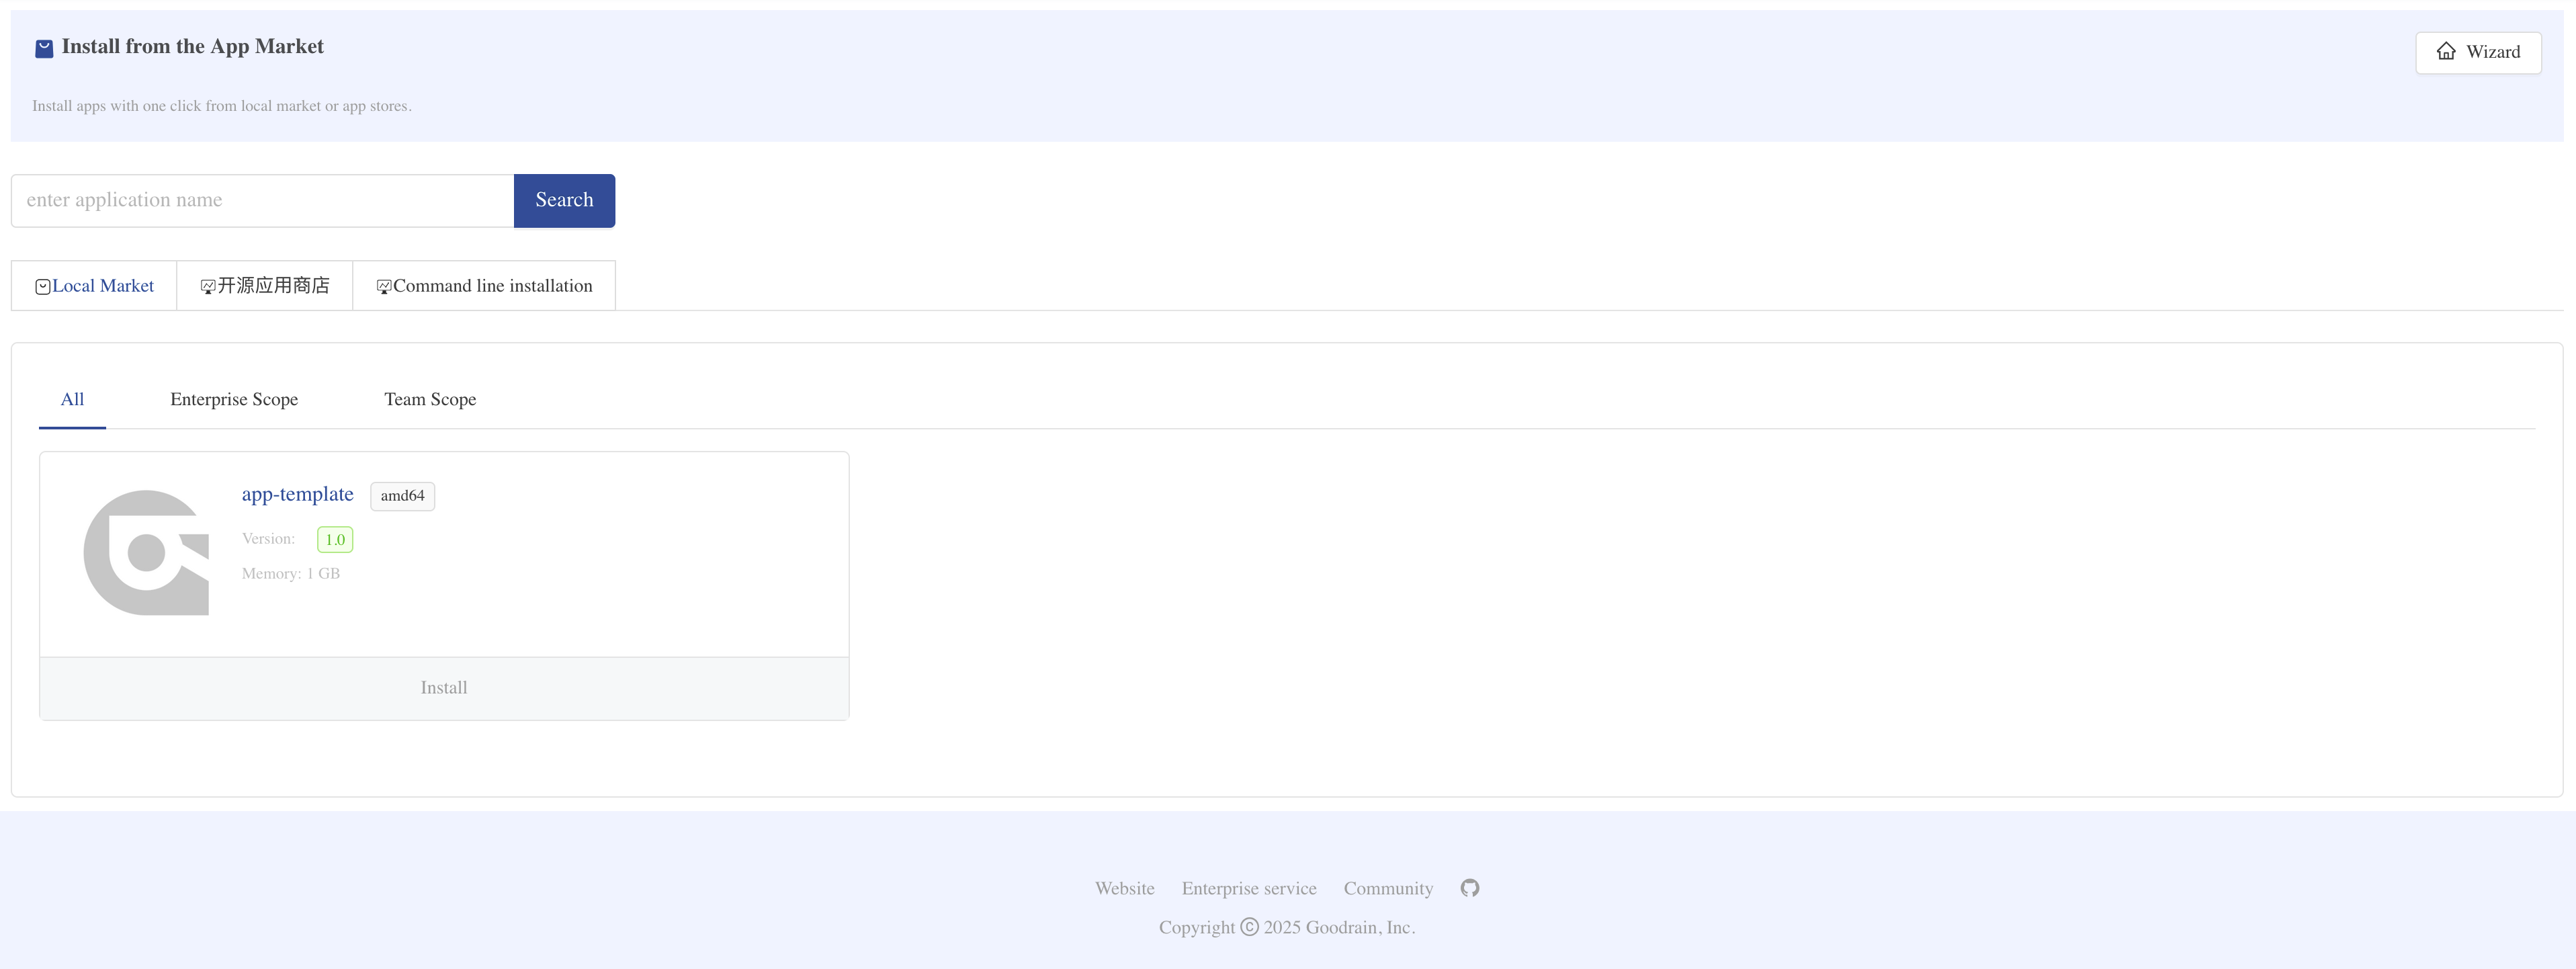
Install from application market
- Enter the target team view and create a new application named
target-app. - Select install from application market ➡️ local component library, choose
app-templateand install. - Expected result: The
target-appapplication contains a component namedapp.
3. Release a new version (2.0)
🚀 Highlights
- Incremental update: Only the changed parts need to be published, reducing release time
- Configuration tracking: Automatically records configuration differences between versions
🧩 Operation process
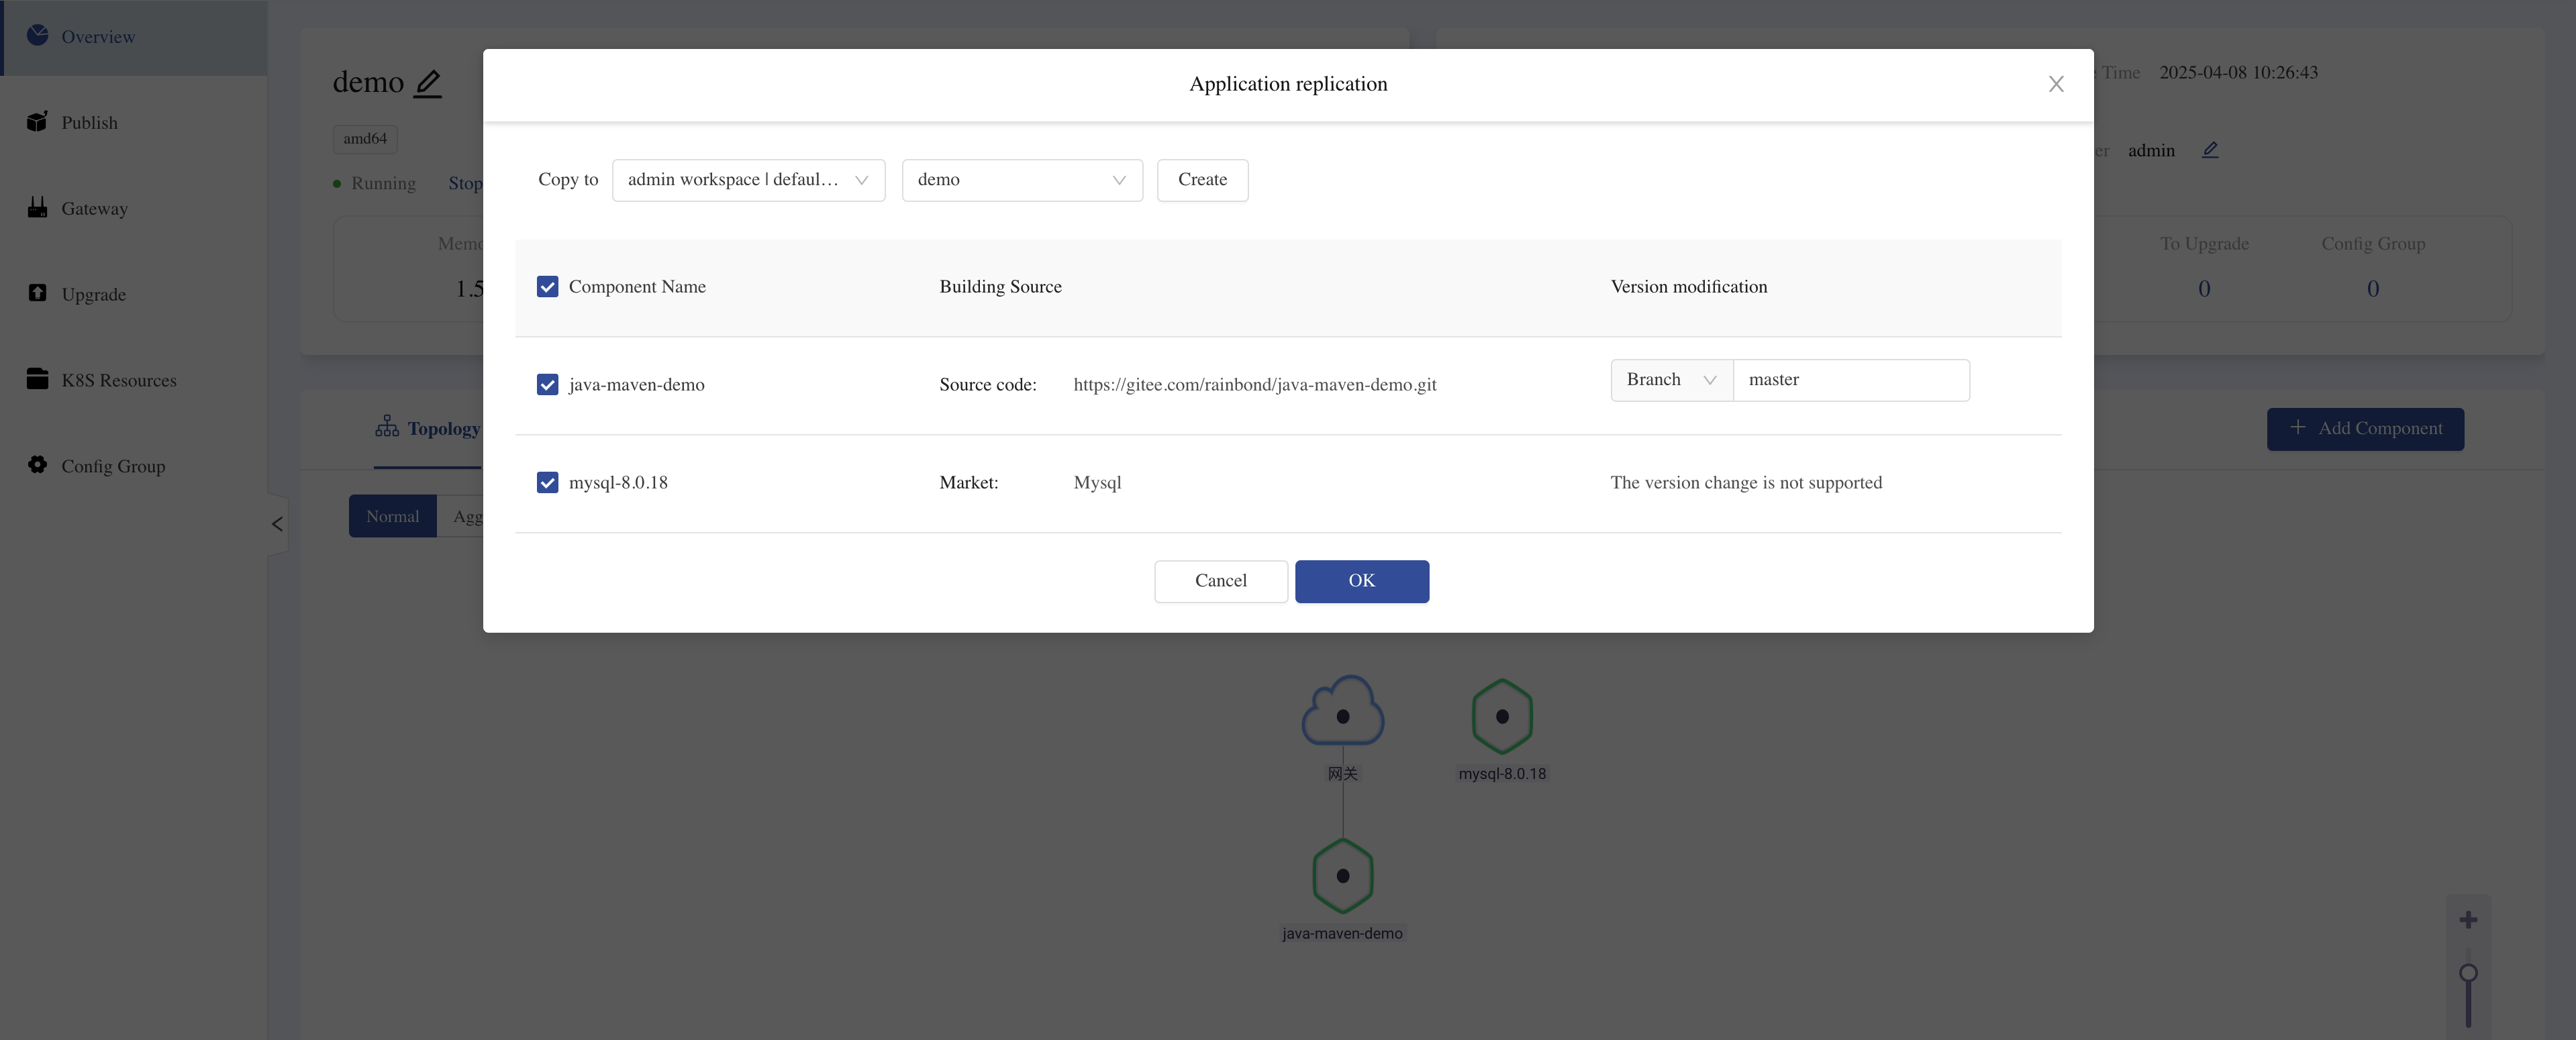
- Update source application configuration
- Enter the
source-appapplication view. - Click the Quick Copy button above to copy a new component.
- Enter the
appcomponent ➡️ environment configuration:- Add environment variable
demo=demo. - Click the Update button in the upper right corner.
- Add environment variable
- Enter the
- Release a new version
- Enter the application view ➡️ publish application ➡️ publish to component library.
- Select the
app-templateapplication template. - Version number is
2.0. - Confirm submission.
- Select the
- Enter the application view ➡️ publish application ➡️ publish to component library.
4) Version upgrade and rollback
🚀 Highlights
- Seamless upgrade: Maintains data and configuration continuity
- One-click rollback: Quickly revert to a stable version in case of problems
🧩 Operation process
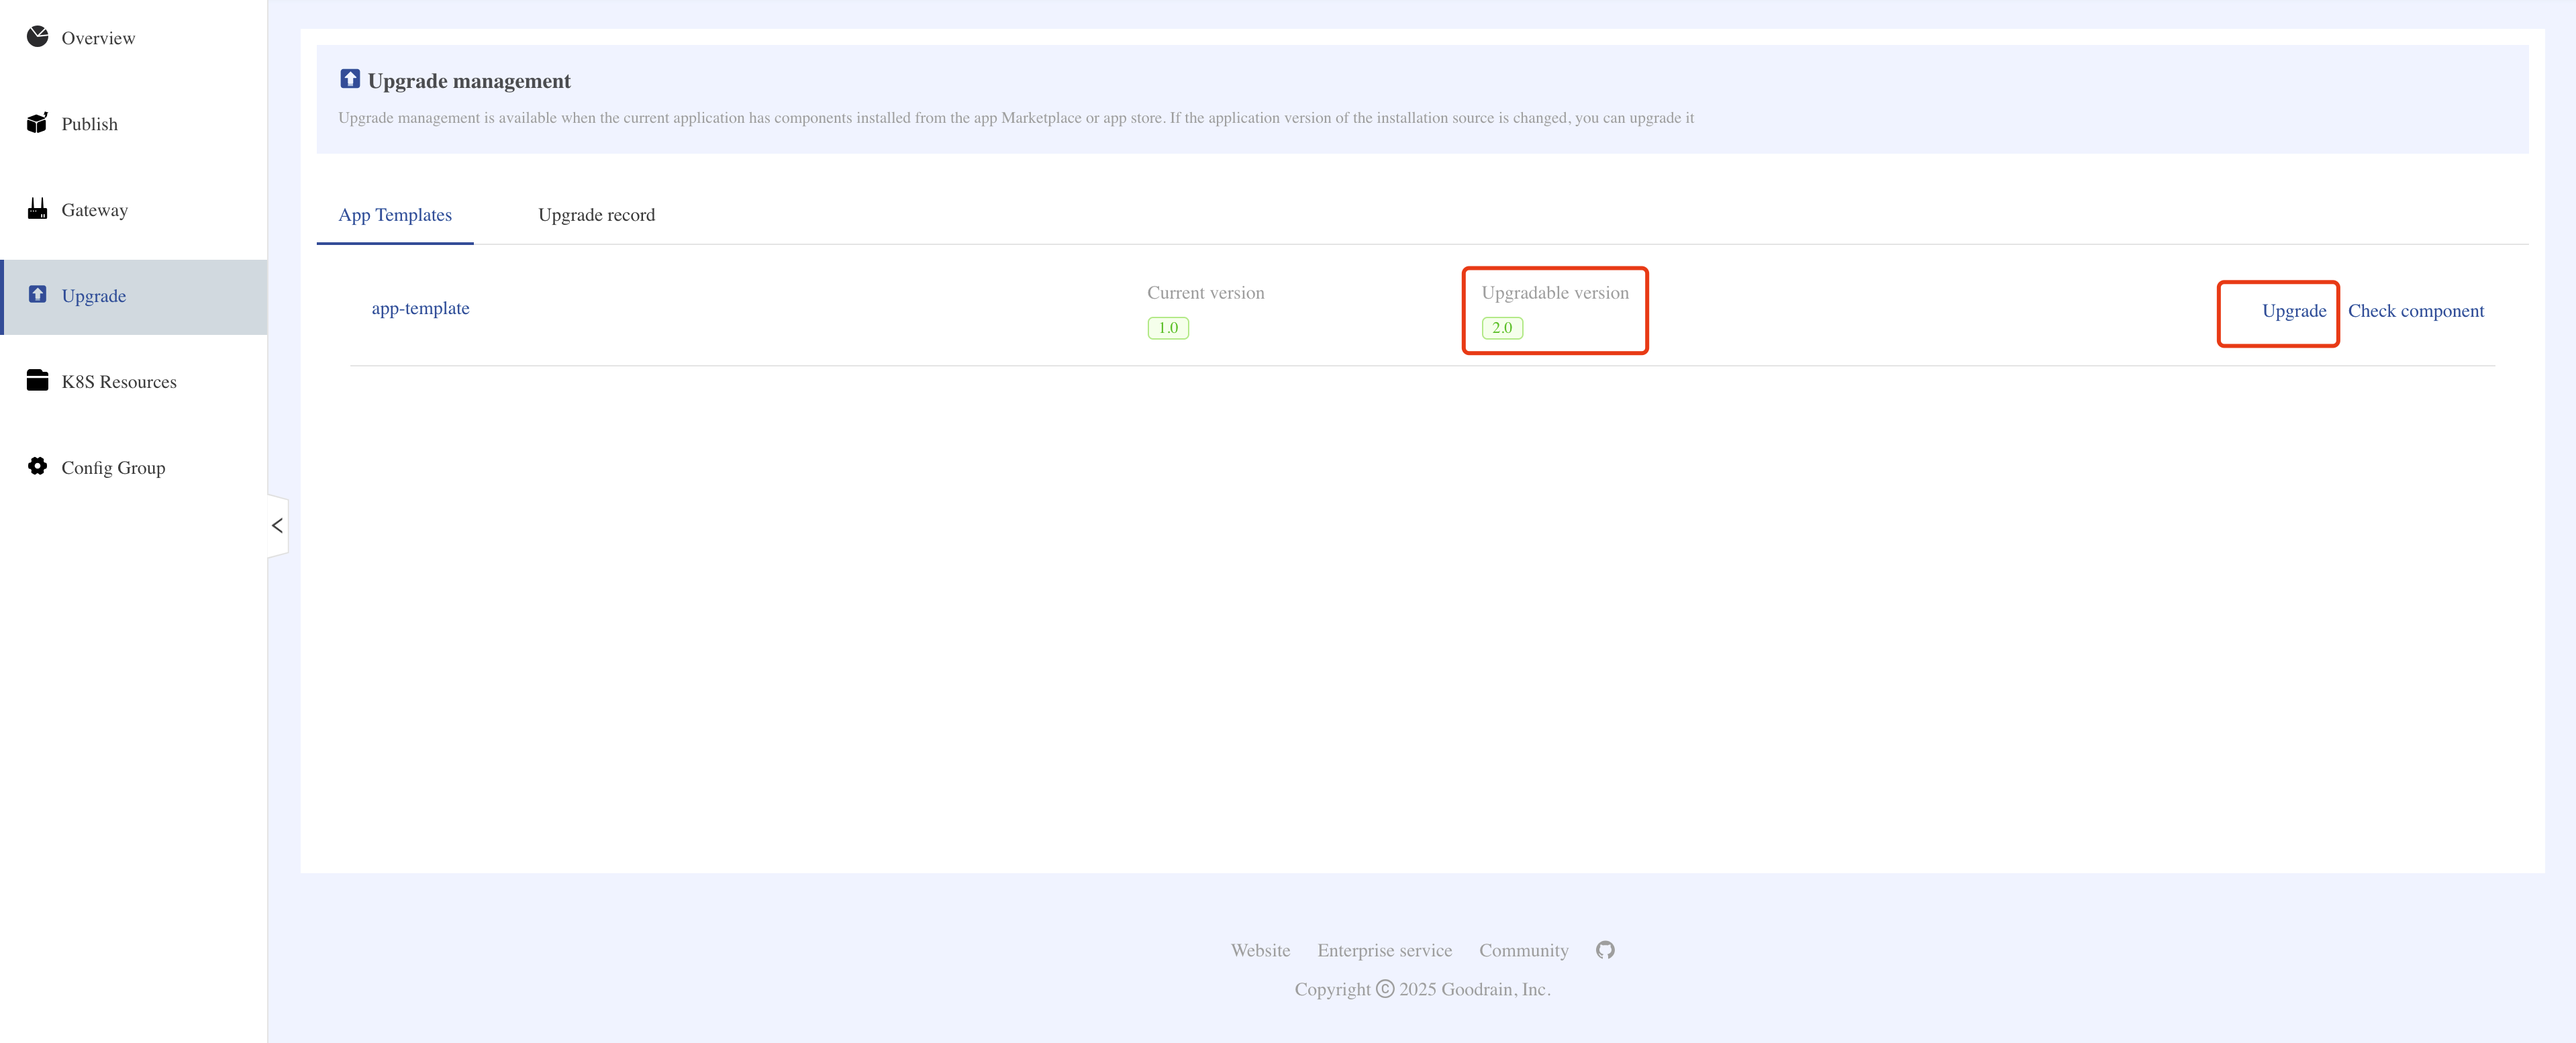
- Upgrade to new version
- Enter the
target-appapplication view ➡️ application upgrade, upgrade to version 2.0. - Verify upgrade result:
- New
app-copycomponent added. - The original
appcomponent has added thedemo=demoenvironment variable.
- New
- Enter the
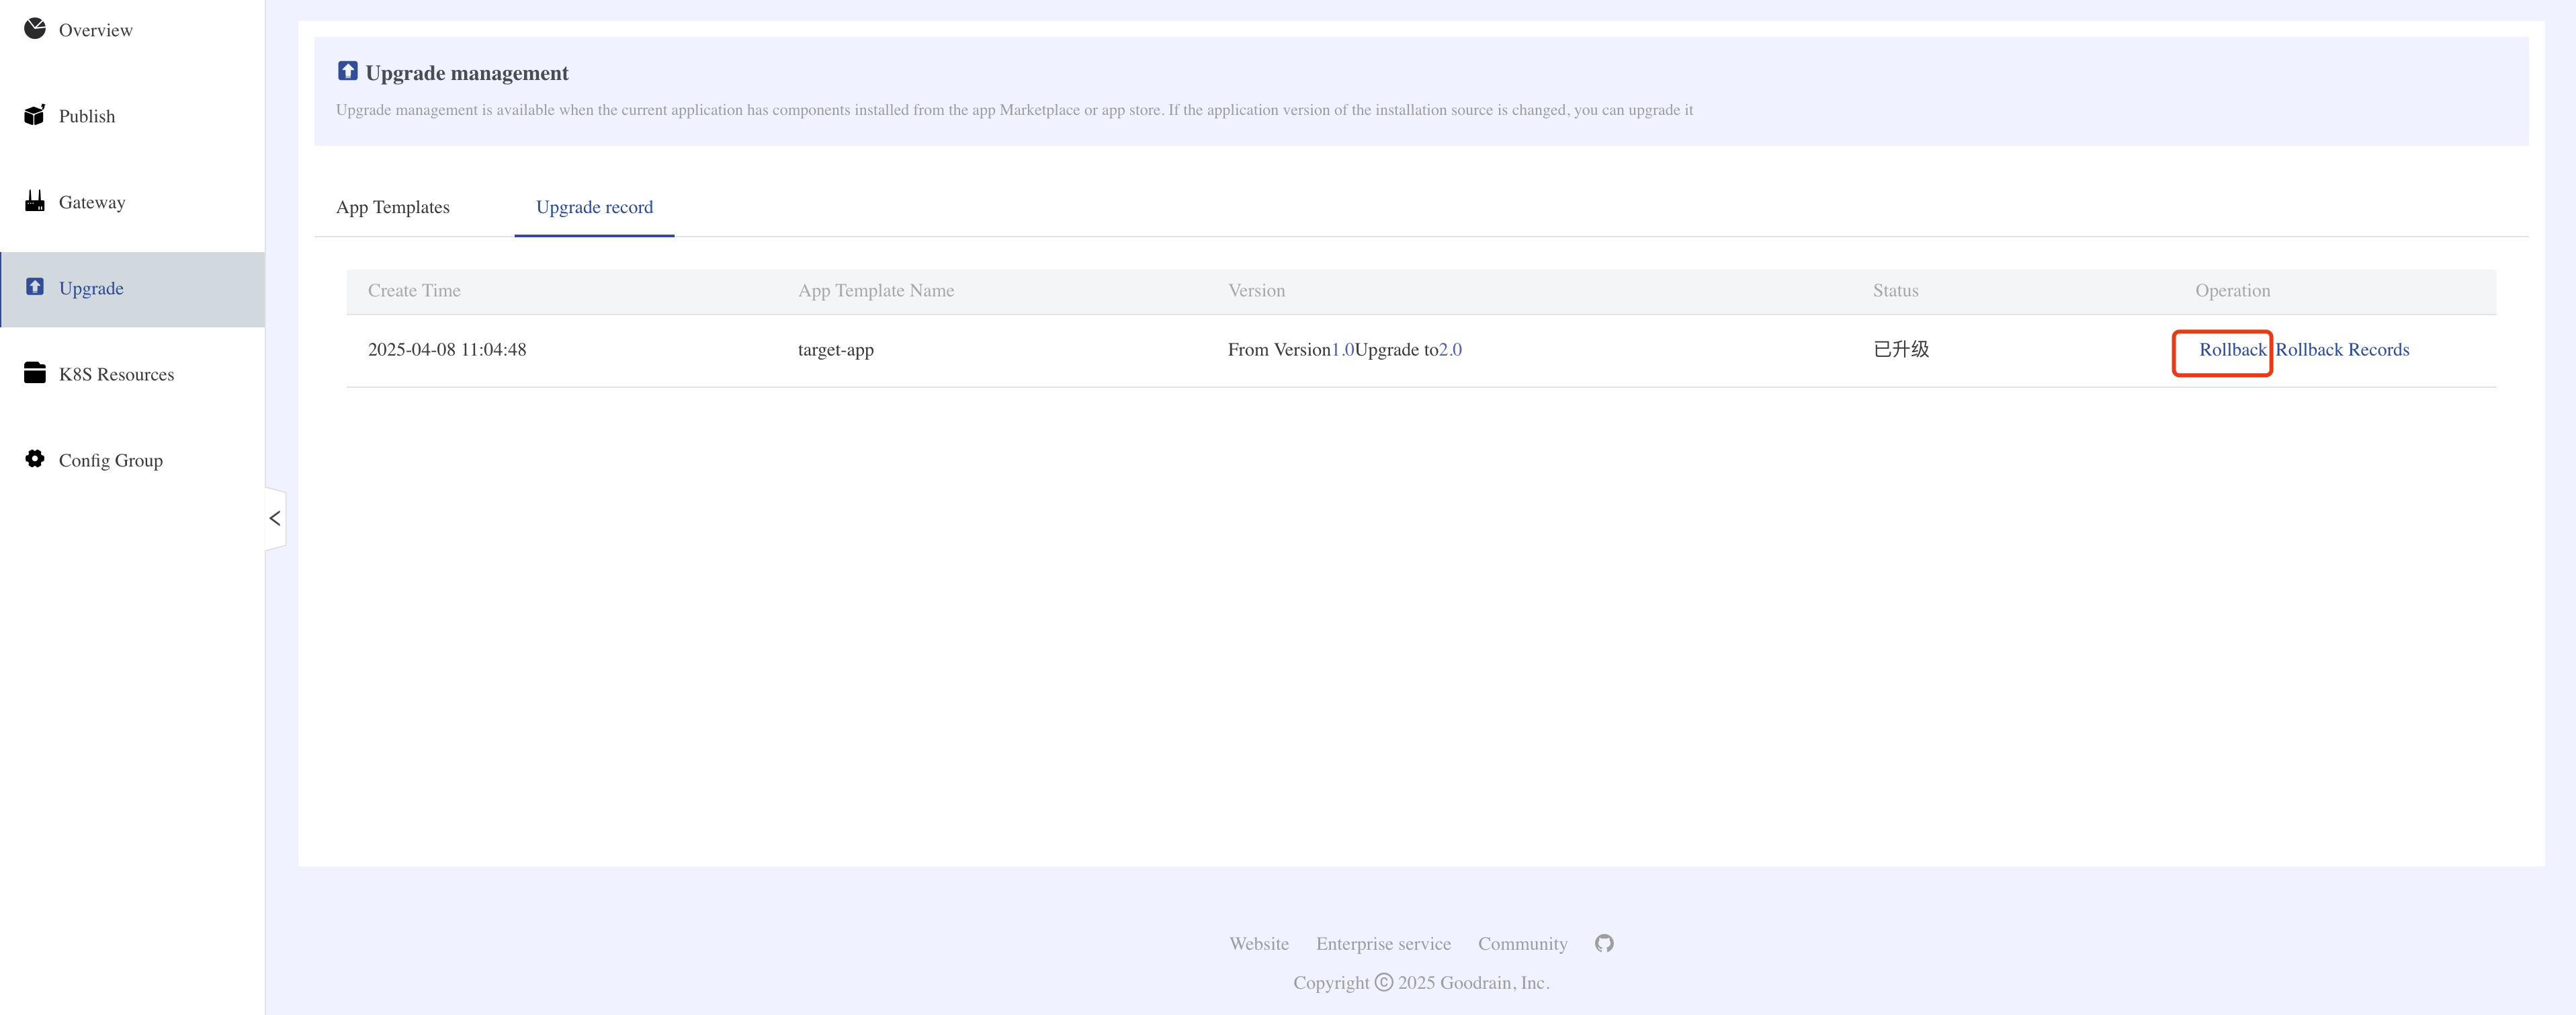
- Rollback to the old version
- Enter the
target-appapplication view ➡️ Application upgrade ➡️ Upgrade record. - Rollback to version 1.0.
- Verify the rollback result:
- The
app-copycomponent has been removed. - The
demoenvironment variable of theappcomponent has been removed.
- The
- Enter the
info
- The application template does not contain runtime data, and rollback will not restore database content
- Version numbers are recommended to follow the semantic version specification (X.Y.Z)
- For production environments, it is recommended to first verify the upgrade process in a test environment